Trails® are the one thing in Horse that takes a minute to get used to. Once they click, the rest of the browser stops feeling weird. Everything below is the short version of what you need to know on day one.
What Trails® are
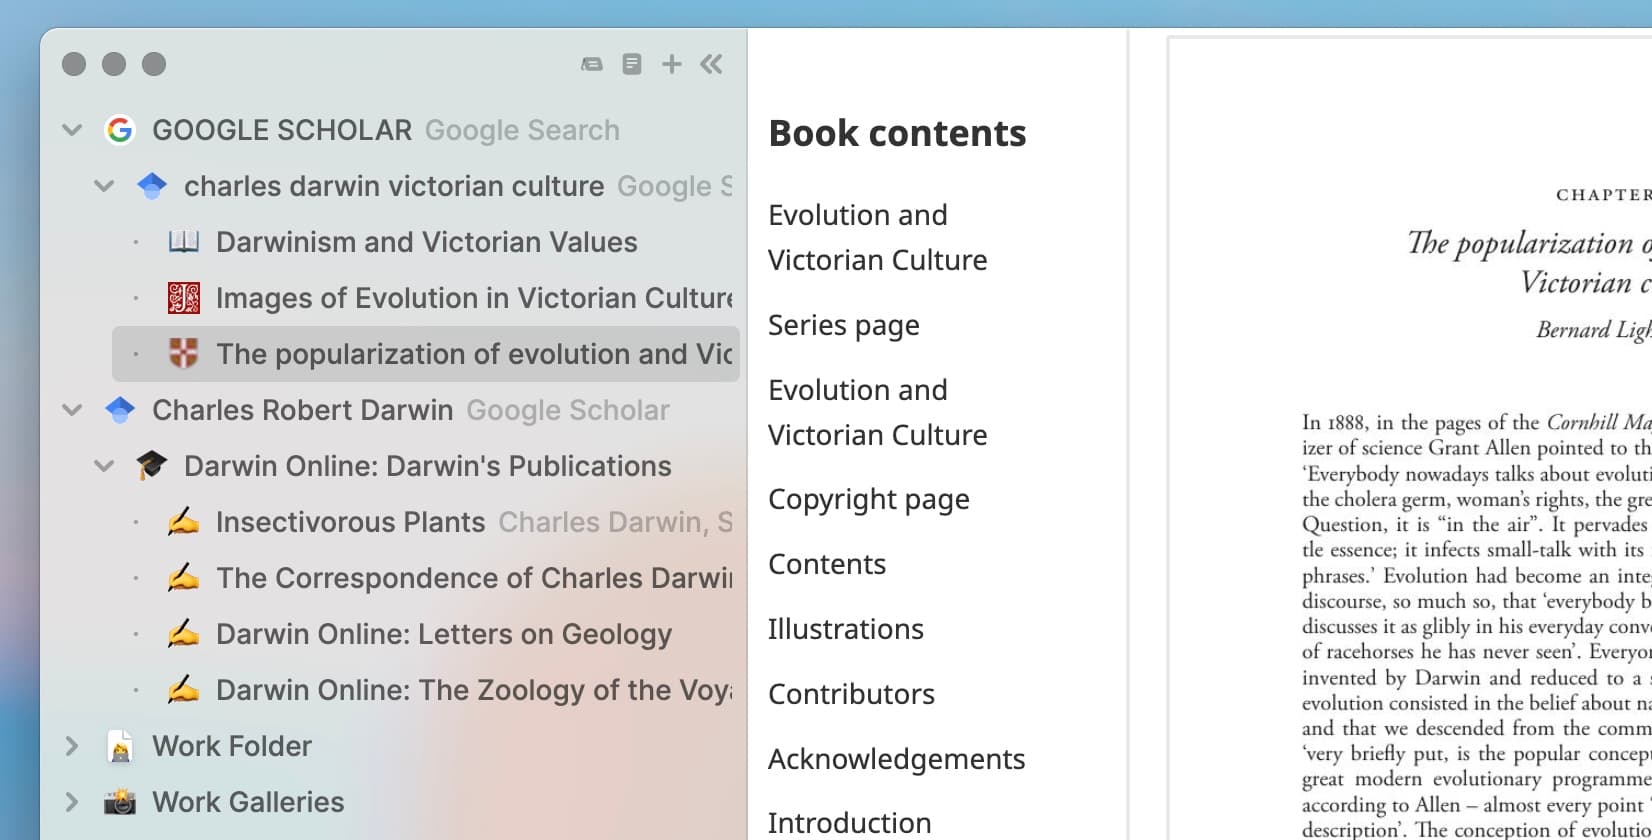
Trails® are the paths your browsing takes, drawn out in the sidebar. Click a link and the new page branches off the page you came from instead of replacing it. Click another link and that branches too. The source pages remain visible until you choose to delete them. Horse merges what tabs, history, and bookmarks each tried to do, and shows them in one vertical layout.
Two shapes you can make:
- Sub-Trail. Created automatically when you open a link from inside a Trail. Sits underneath its parent, which is how the hierarchy gets built.
- Side-Trail. Branches sideways instead of downward. Useful when you want to chase something tangentially related without burying the thread you’re already on.
1. Opening a New Trail
Use the shortcuts below depending on where the new Trail should land. If it opens with a search field, type the search term or URL you need and hit enter. You are now on your way.
Keyboard Shortcuts:
- ⌘+⌥+N opens a new Trailhead at the top of the sidebar.
- ⌘+T opens a new Sub-Trail on the current Trailhead.
- ⌘+⌥+T opens a new Sub-Trail underneath the current Trail.
- ⌘+⌥+⇧+T opens a new Side-Trail next to the current Trail.
Mouse Actions:
- Click the + at the top of the sidebar to create a new Trail.
- Right-click on an existing Trail to open a Sub-Trail or Side-Trail.
2. Expanding & Collapsing Trails
Keyboard Shortcuts:
- To collapse a Trail: ⇧+⌘+◀
- To expand a Trail: ⇧+⌘+▶
Mouse Actions:
- Click the
>icon next to a Trail to expand or collapse it. - Double-click a collapsed Trail to expand all its Sub-Trails.
To collapse all Trails at once:
Keyboard Shortcuts:
- ⌥+L: collapse all Trails.
3. Deleting Trails
To delete one Trail:
Keyboard Shortcuts:
- ⌘+W: delete the current Trail.
- ⌘+⇧+W: delete the current Trail and all its Sub-Trails.
Mouse Actions:
- Click
Xnext to the Trail.
To delete multiple Trails in one go:
- Select multiple Trails with ⌘ + Click and then right-click to see an option to delete the selected Trails.
4. Restoring a Closed Trail
Restoring a closed Trail also restores its children.
Keyboard Shortcuts:
- ⌘+⇧+T: reopen the last closed Trail.
Mouse Actions:
- Menu > File > Undo Delete Trail
5. Selecting and Moving Multiple Trails
Organise, export or delete multiple Trails at once.
Keyboard Shortcuts:
- ⌘ + Click: select multiple Trails.
Mouse Actions:
- Drag-and-drop selected Trails to move them.
- Right-click for bulk actions (copy to Markdown, delete and add to a new folder).
6. Muting Audio in a Trail
Click the sound icon that appears on a Trail playing audio to mute it. Click again to unmute.
7. How to View the URL
You can double-click on a page anytime to reveal and edit the URL. Or click ••• at the side of each page and choose Edit Link.
8. How to Change Your Default Search Engine in Trails
Horse’s default search engine is Google. You can choose alternatives, such as Bing, Kagi, DuckDuckGo, Perplexity, Startpage, Swisscows, MetaGer, Searx, and Gigablast. To change your search engine, simply go to Settings:
- Mouse users: Menu > Horse > Settings
- Keyboard users: ⌘+,
Scroll to find a drop-down menu where you can select the default search engine you want.
9. All the Keyboard Shortcuts You Need
If you need a recap on these shortcuts, visit the Menu to see the relevant shortcuts. You can also customise them to your own alternatives by visiting Settings:
- Mouse users: Menu > Horse > Settings
- Keyboard users: ⌘+,
Scroll to find the Shortcuts menu where you can view and customise them.
Next
That’s enough Trails® to start. The next post covers the parts of Horse that aren’t navigation, the small features that make the sidebar somewhere you can actually live.
All posts in this series: